How To Deploy a Hyperlane Bridge - Easy For Non-Devs
How to deploy hyperlane bridge with no code. Hyperlane warp route tutorial. no code. how to create a hyperlane bridge with no code.


This guide will show you how to deploy a Warp Route using the Hyperlane CLI.
You must have Node Installed on
Installing the Hyperlane CLI
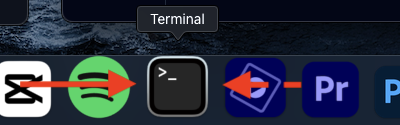
- To deploy the Warp Route contract, you’ll need to install the Hyperlane CLI via your MacOs terminal app.

Run the command below to install it:
npm install -g @hyperlane-xyz/cli
```"- Once you’ve installed the Hyperlane CLI, execute the command:
hyperlane --versionThis command checks the current version of the Hyperlane CLI installed on your machine. You should see an output similar to the following.
Creating a Burner Wallet
- Before deploying the contract, you need to create a burner wallet and transfer a small amount of ETH to it for gas fees ($5 at least) . After setting up the wallet, you’ll need to export its private key to enable the Hyperlane CLI to access it.
In your terminal, run the following command, replacing “YOUR_PRIVATE_KEY” with the private key of the burner wallet you just created:
export HYP_KEY="YOUR_PRIVATE_KEY"Initializing the Warp Route
Once you’ve exported your private key, you can initialize the Hyperlane Warp Route using the command:
hyperlane warp initThe Hyperlane CLI will automatically detect your wallet address from the exported private key. You’ll be prompted to confirm the public key; type Y in the prompt to confirm.
Next, you’ll be prompted in the terminal to choose between mainnet and testnet. We will be working with mainnet chains for this tutorial walkthrough; select mainnet.
Next you will see a long list of chains available to choose from. We want to bridge the token Degen with the contract address 0x4ed4E862860beD51a9570b96d89aF5E1B0Efefed which is currently live on Base to Optimism. Navigate to Base and Optimism, use the spacebar button to select both chains, then hit enter.
Configuring the Warp Route
The next step involves configuring the warp route for the Degen token. You have a few options to set up a warp route:
-
Synthetic: This option is used when creating a new ERC-20 token on a new chain.
-
Collateral: This option is for ERC-20 tokens that have already been deployed on a specific chain.
Since the Degen token is live on Base, select the collateral option.
The Hyperlane CLI will automatically detect the mailbox address for each chain from its registry. Confirm the detected mailbox address by typing Y when prompted.
- Next, you’ll be asked to enter the contract address of the token:
0x4ed4E862860beD51a9570b96d89aF5E1B0EfefedThis is the contract address for the Degen token on Base. You can purchase some Degen on Uniswap ($5 above recommended) , then copy the contract address and paste it into the Uniswap frontend. You’ll need the Degen token to complete the Warp Route bridging.
The next step is to configure the warp route for the Degen token on Optimism.
In this scenario, choose the synthetic option since the Degen token is not live on Optimism. It’s essentially a new token being deployed and a new bridge route being configured by Hyperlane. Again, confirm the mailbox address on Optimism when prompted.
Our warp route configuration has been defined; the next step is to deploy the contract.
Deploying the Warp Route
Deploying the Warp Route Once the warp route is configured, you can proceed to deploy the warp route contract by executing the following command:
hyperlane warp deploy
You’ll be asked whether you’d like to use an API key to verify the contract. For this tutorial, select “N” as verification is not required.
The CLI will then create a Warp Route Deployment Plan and it will prompt you to confirm if it’s correct. Type Y to proceed.
If you get a warning in your terminal about “Deployment may fail due to insufficient balance(s)”, ensure you have at least $5 worth of ETH on both chains (Base and Optimism), then type Y to proceed.
Once the deployment is complete, you’ll see a confirmation in your terminal. The output will include your warp route configuration, which should look something like this:
The next thing you want to do is copy the warp route config output, and we are ready to bridge our Degen token to Optimism.
Bridging the Degen Token
Once the contract is deployed, you can now bridge the Degen token between the Base and Optimism chains. To do this:
-
Go to the Hyperlane Superbridge app.
-
Click on the Settings icon.
-
Navigate to Warp Routes and click Customize.
-
Paste the warp route config output you copied into the box and hit Save.
5. Connect your wallet and choose the Base and Optimism chains.
6. Select the amount of Degen tokens you want to bridge, and initiate the bridging process.
You can check if your bridging was successful on the Hyperlane Explorer.
Congratulations you just deployed your first Hyperlane Warp Route to bridge the Degen token from Base to Optimism.
STAY TUNED FOR PART 2 (VERY IMPORTANT)
Comments
Loading comments...